
I am a big time doodler. I doodle during meetings at work. I doodle during conference calls. I doodle during regular calls. I doodle a lot, and mostly cookie patterns. (NOTE TO MY BOSS: JUST KIDDING! I DON’T DOODLE, I TAKE GRAPHICALLY INTERESTING NOTES!)
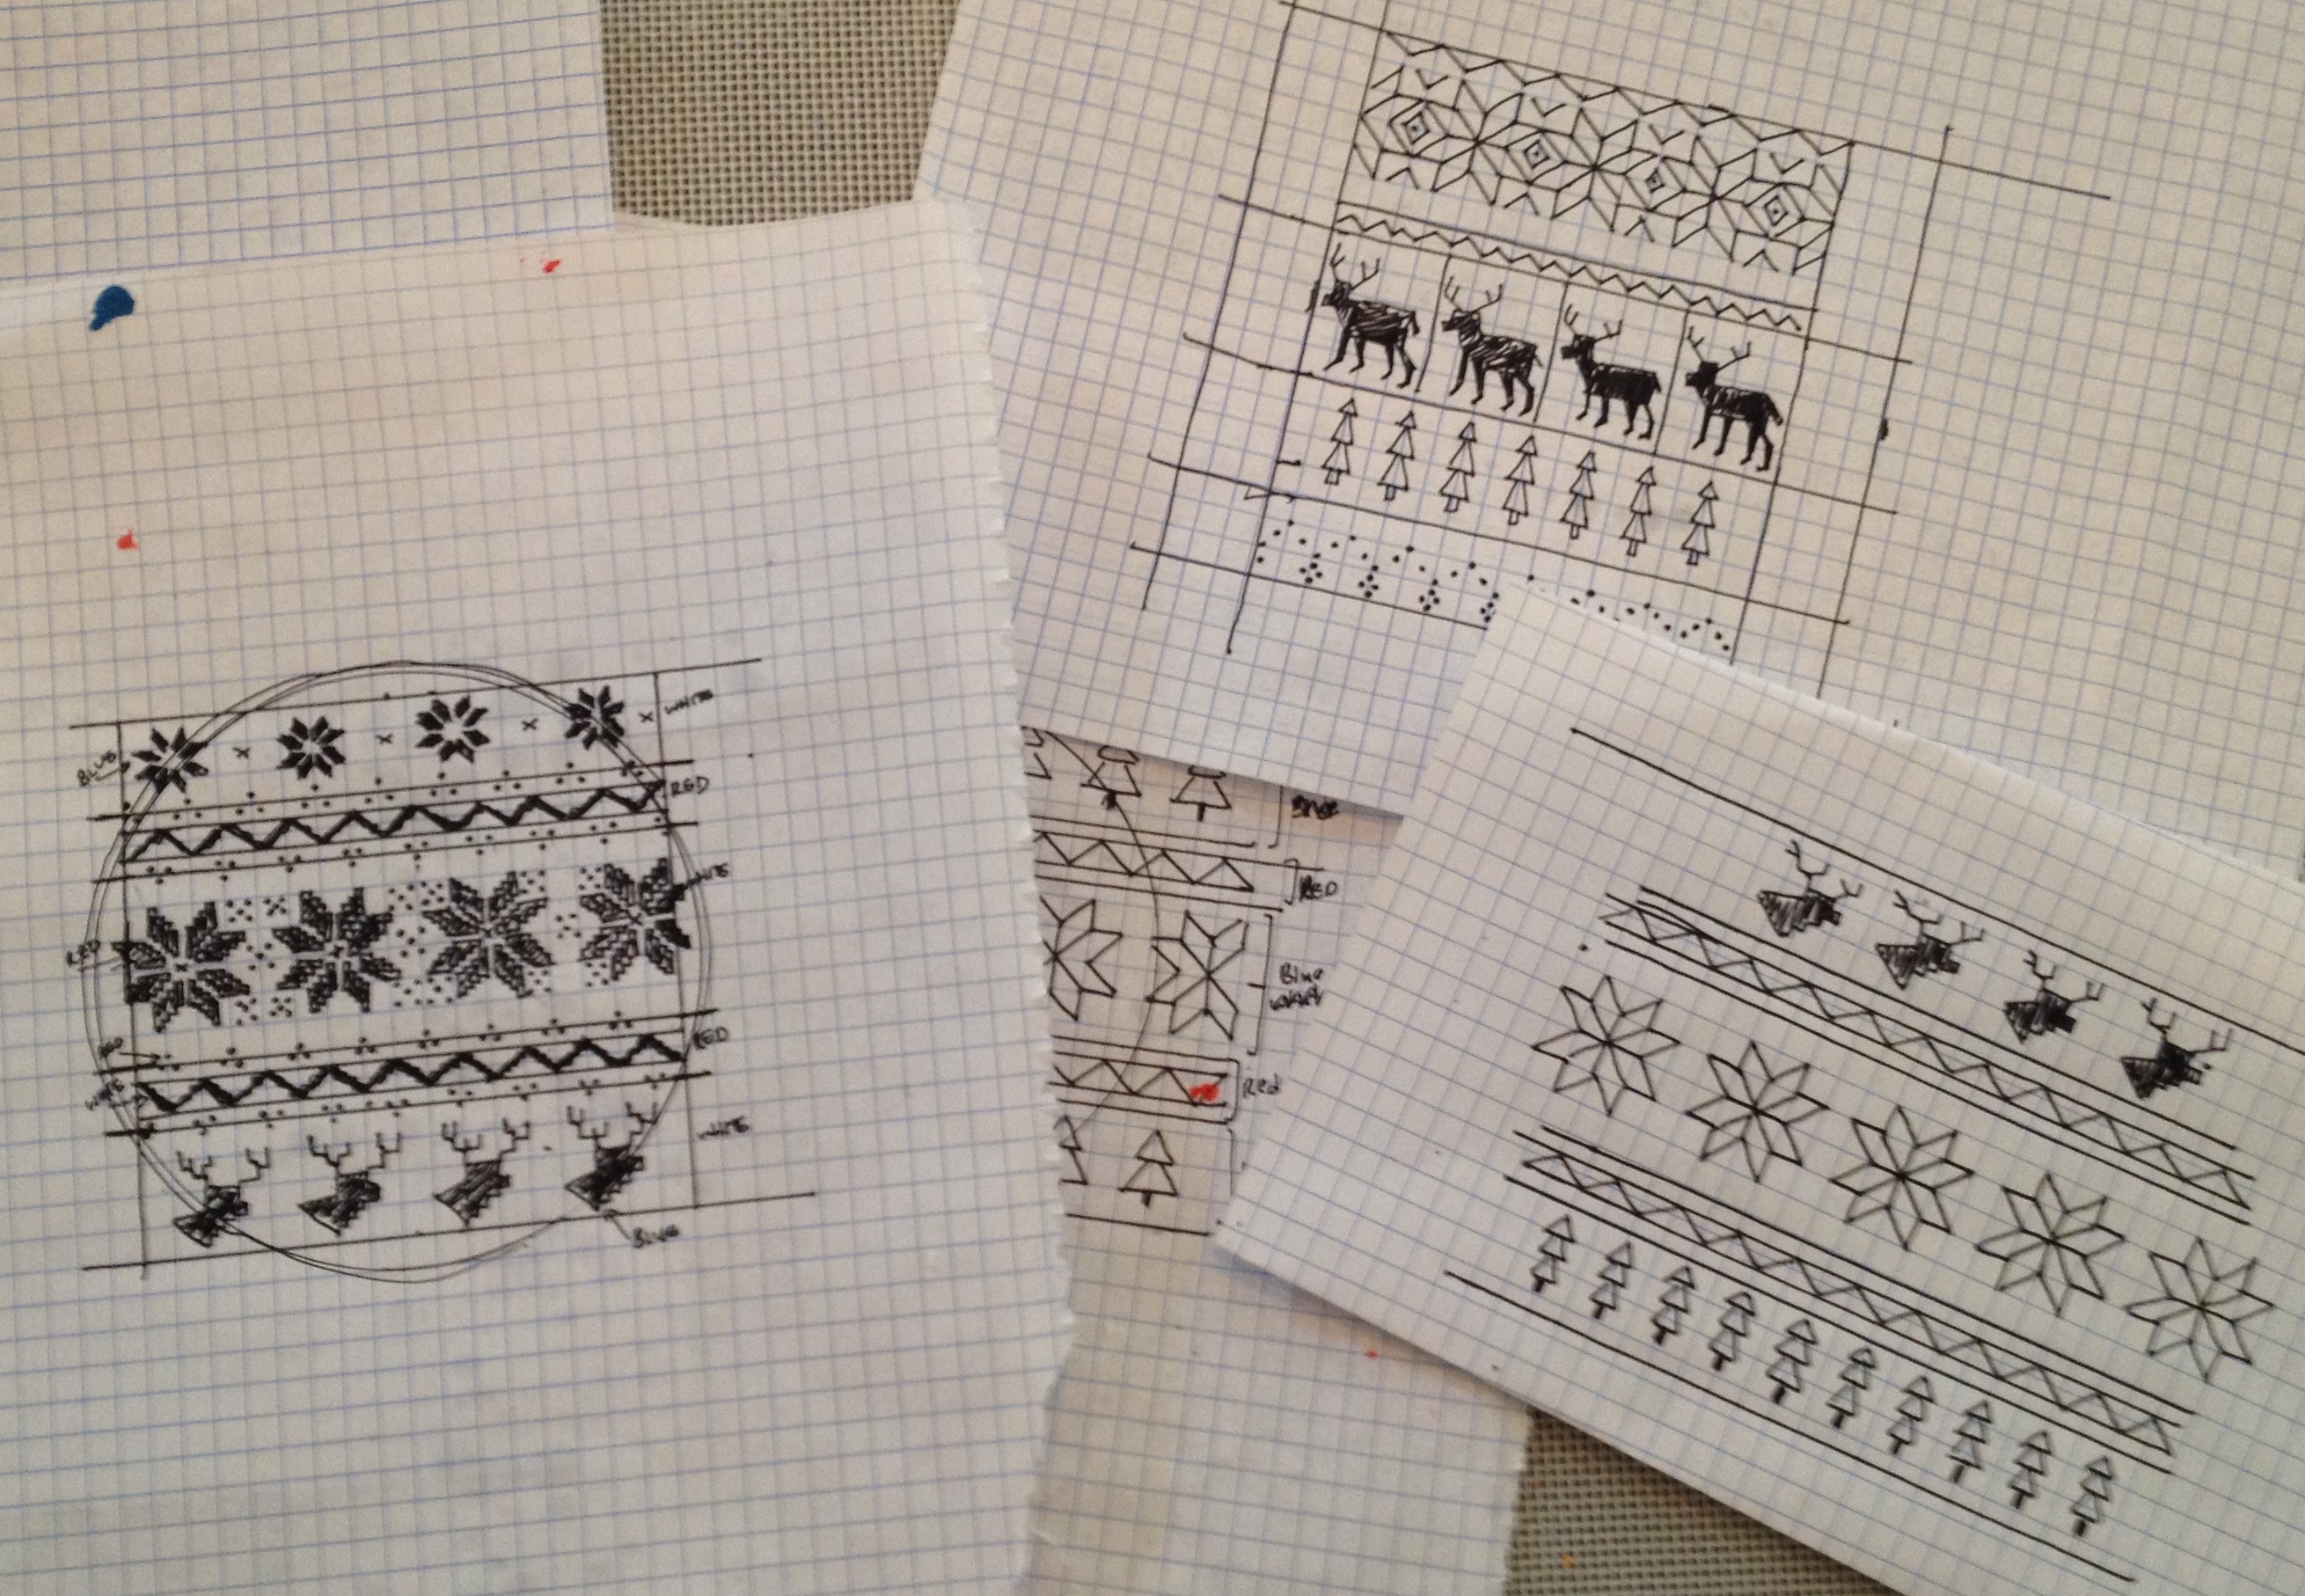
Some of my workplace doodles become serious cookie designs. In this episode of Things I Didn’t Do at Work, I’m going to show you how to get from doodle to beautiful in a few steps. If, for some reason, you don’t doodle cookie patterns at work, you can find needlepoint patterns online. Remember to size them appropriately for your cookie before you print. Or, look no further than the bottom of this page; I’ve included a few of my doodles below to get you started.
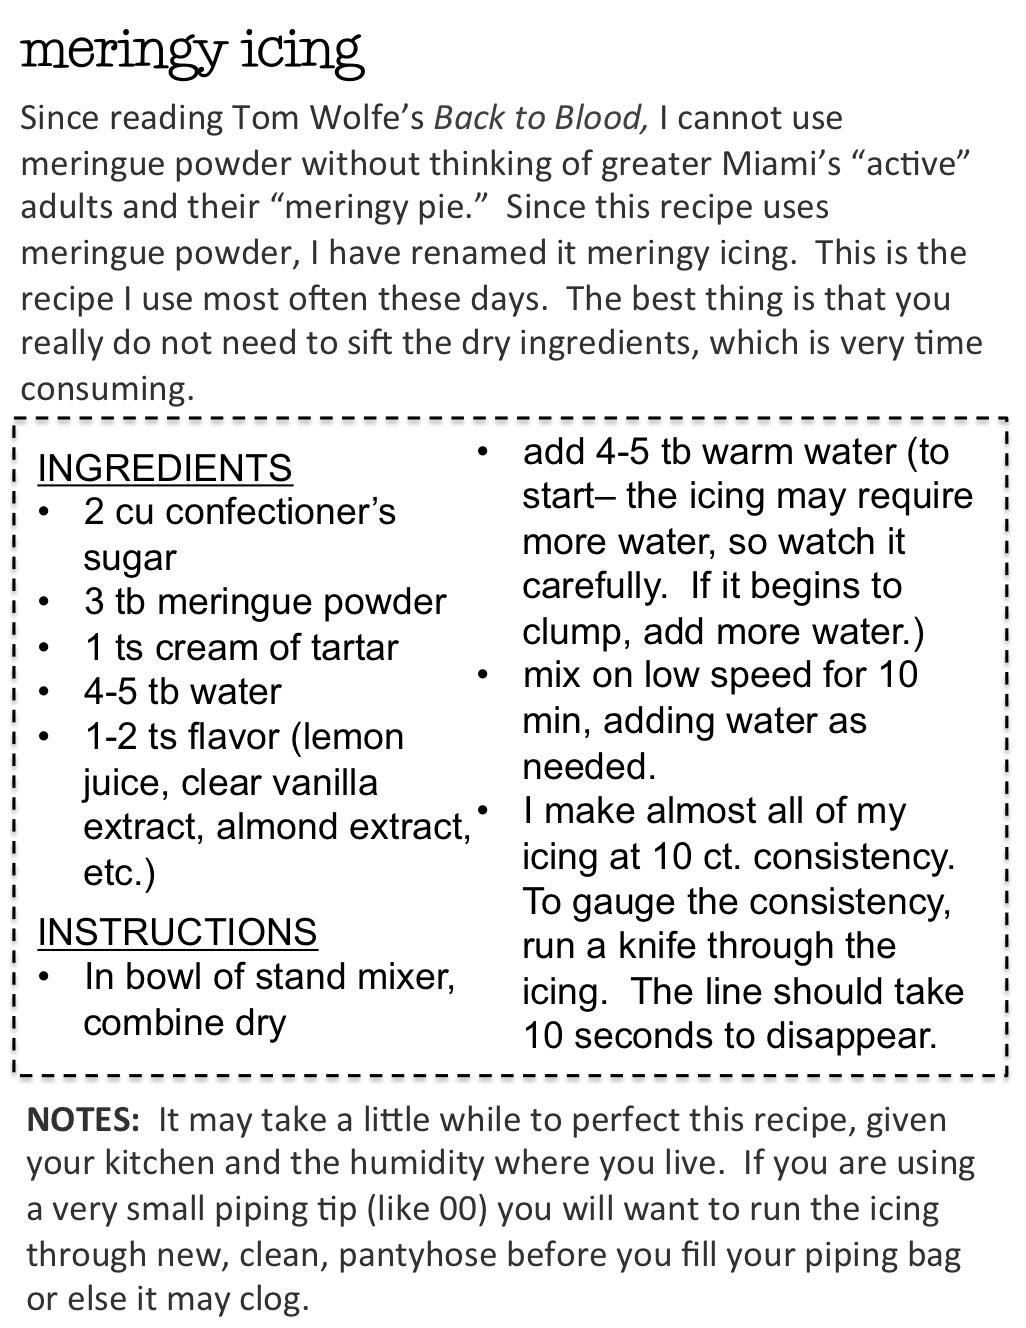
First, you will need a good consistency royal icing. Royal icing consistency is gauged by counts. It literally means count. While the icing is still in your mixing bowl, run a knife through the icing and count how long it takes for the line to disappear. For this technique (called royal icing transfer) I use 15-20 count icing (the line should take 15-20 seconds to disappear.) To make your icing thicker, mix it longer. If it is too thick, add water by the teaspoonful to thin it out.
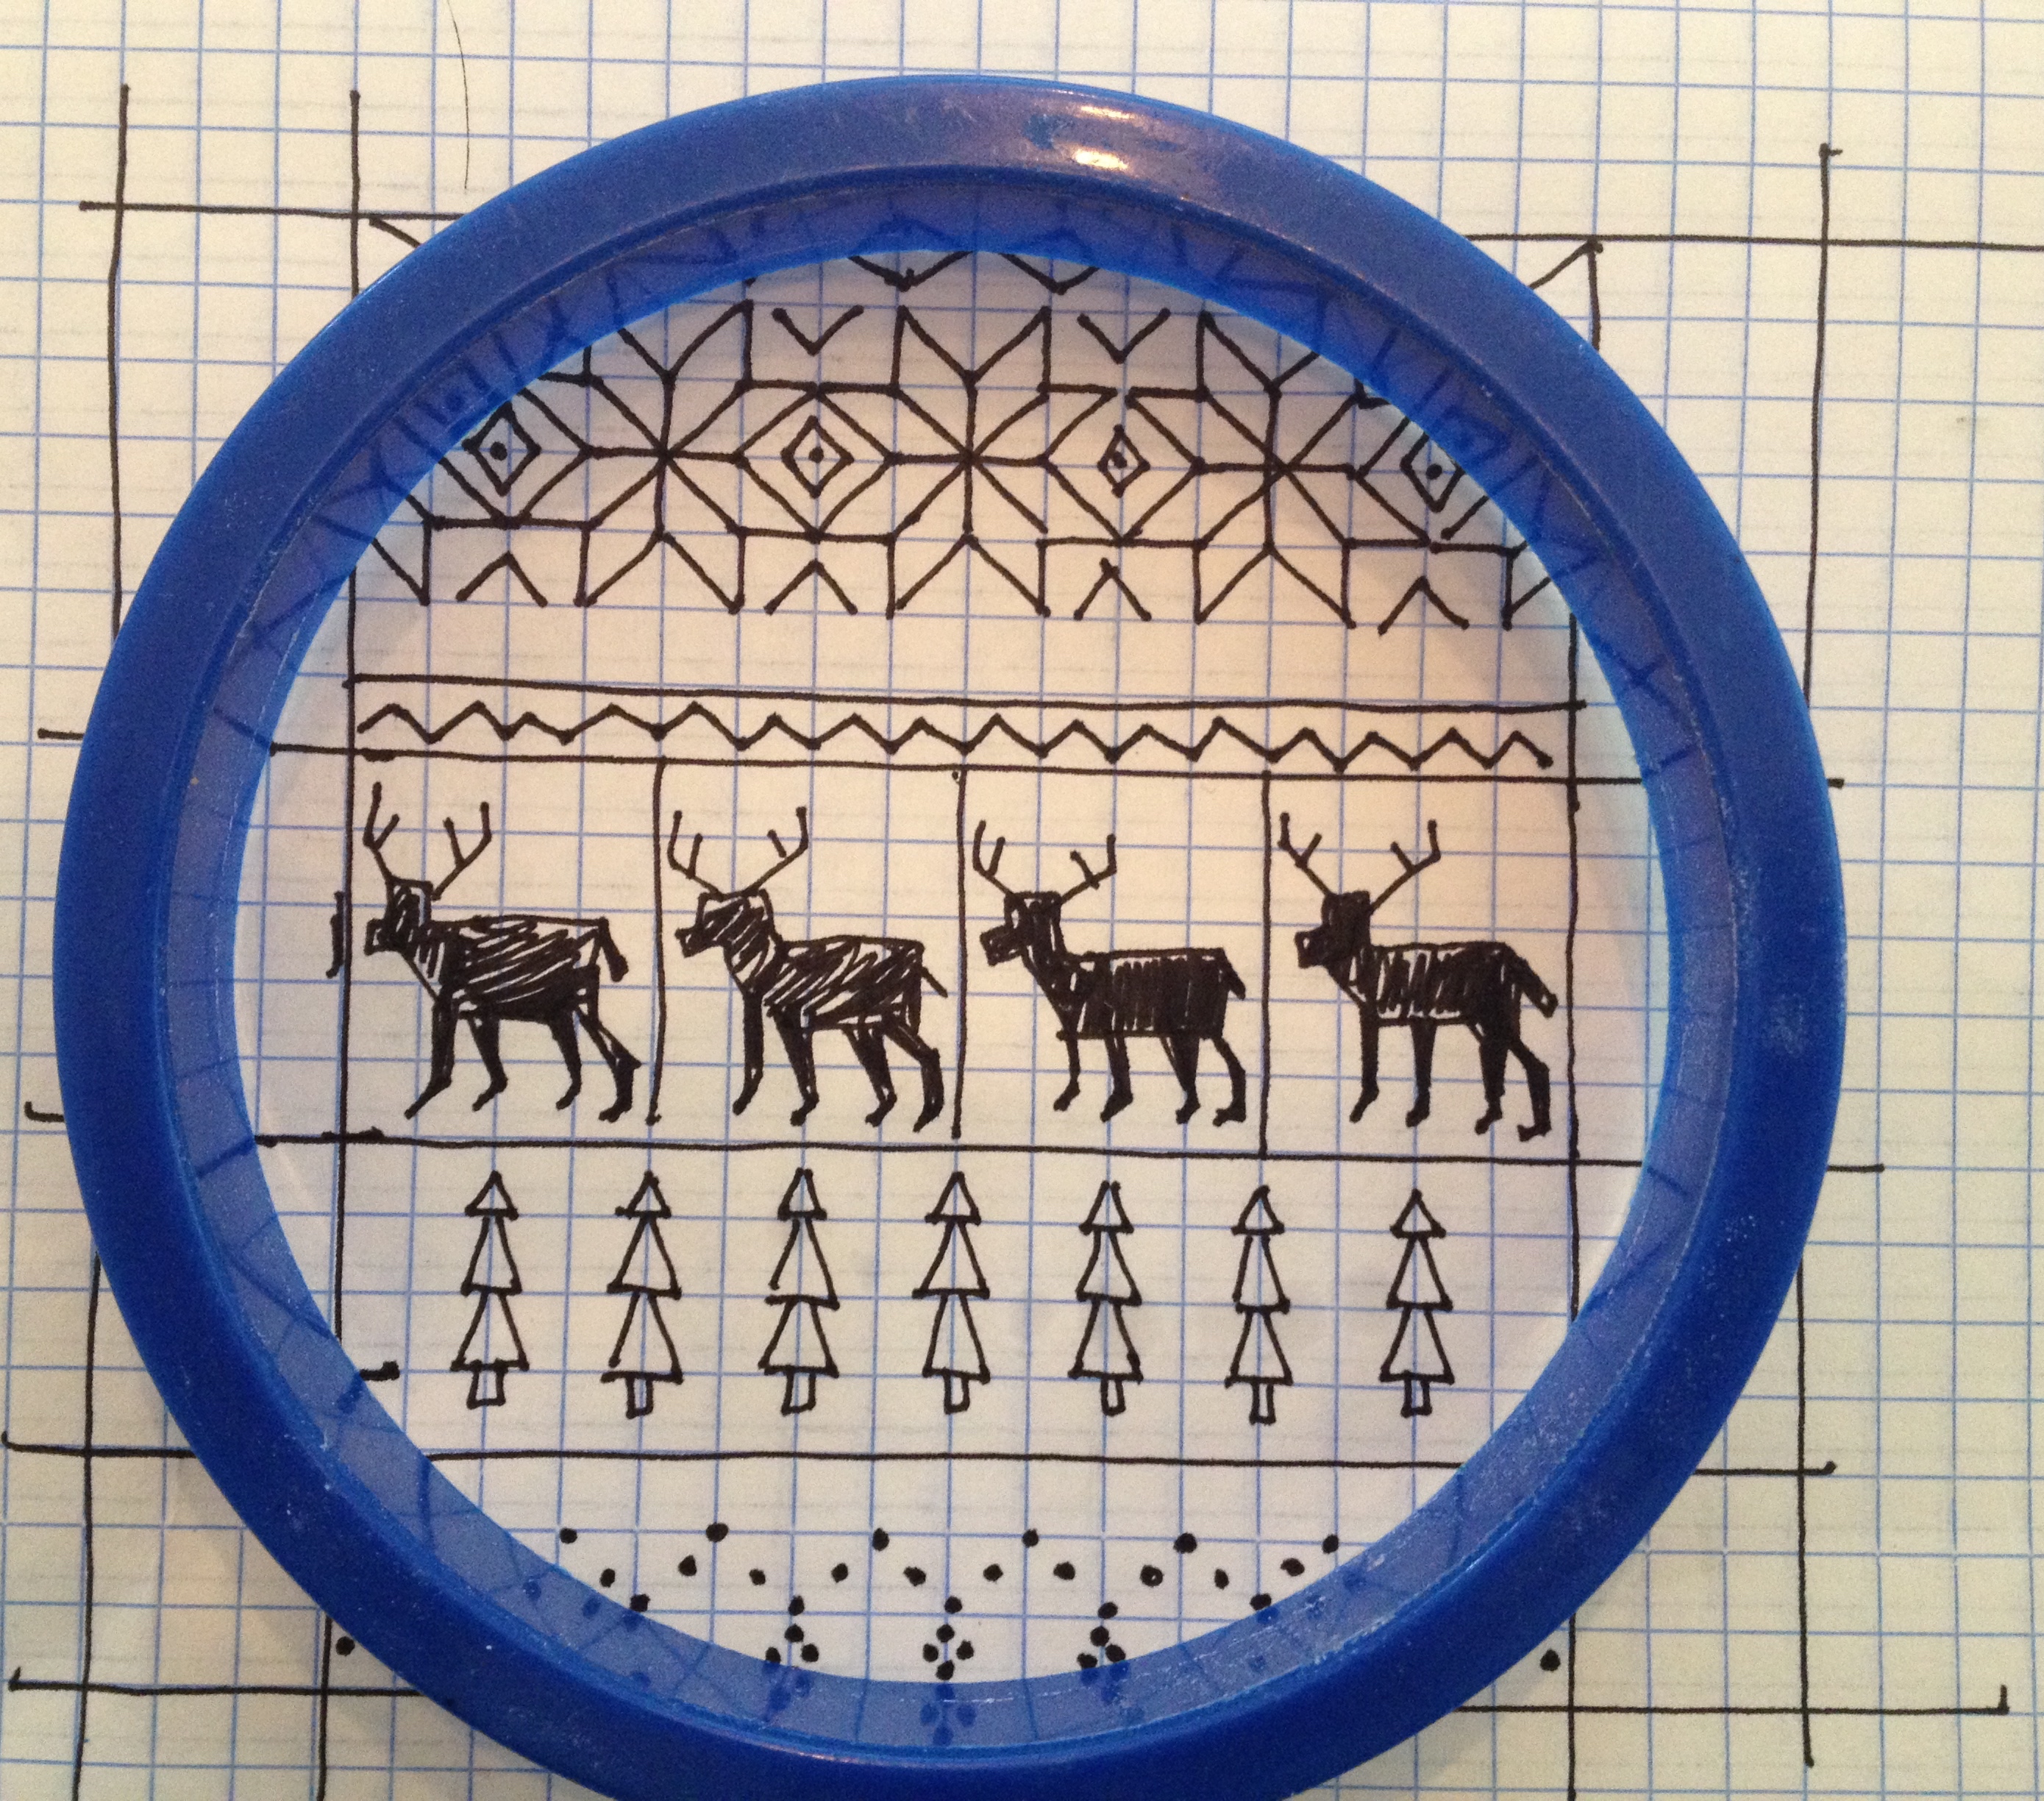
Next, place a cookie cutter on top of your “graphically interesting notes” to make sure your design fits your shape. Most of my cookie cutters are 3-4 inches. Over the years, I’ve learned to doodle (more or less) in a 16×16 square of graph paper to fit most cookie cutters.
 Place a sheet of wax paper on top of your design. The wax paper should be fresh and clean, with no errant crumbs or stray icing.
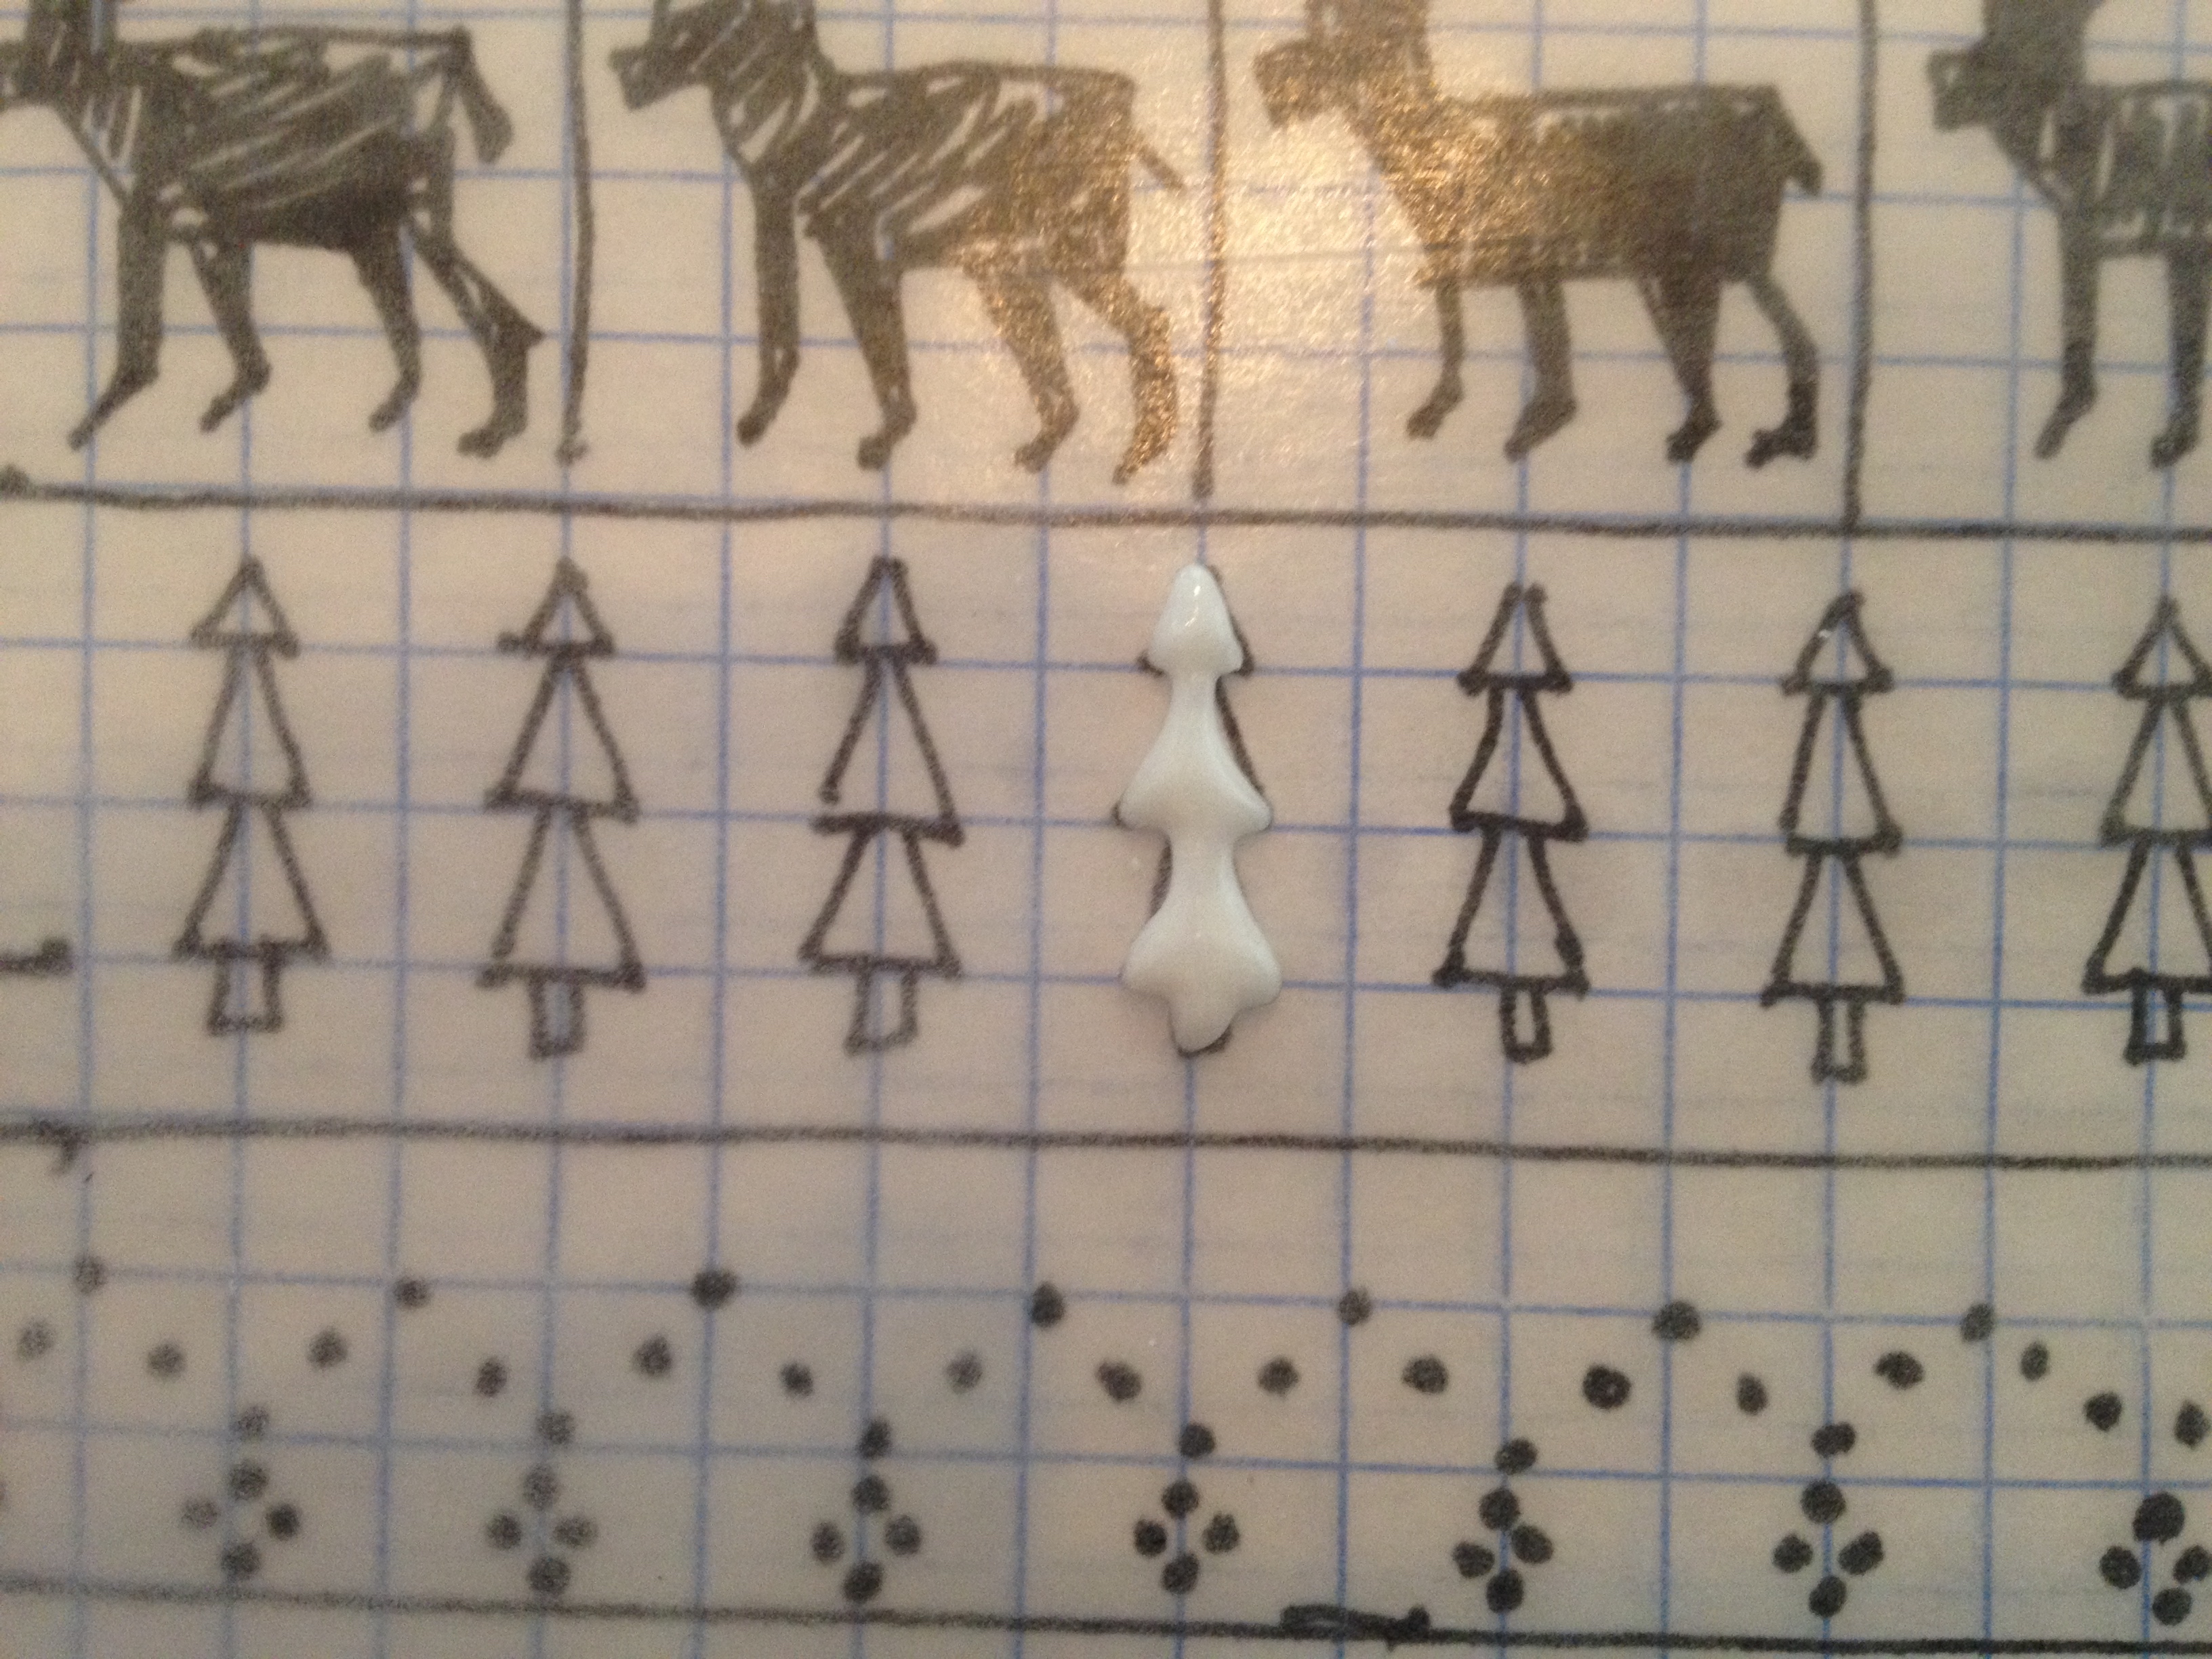
Then, pipe directly on to the wax paper. Below you will see how I piped the pieces for the design above.
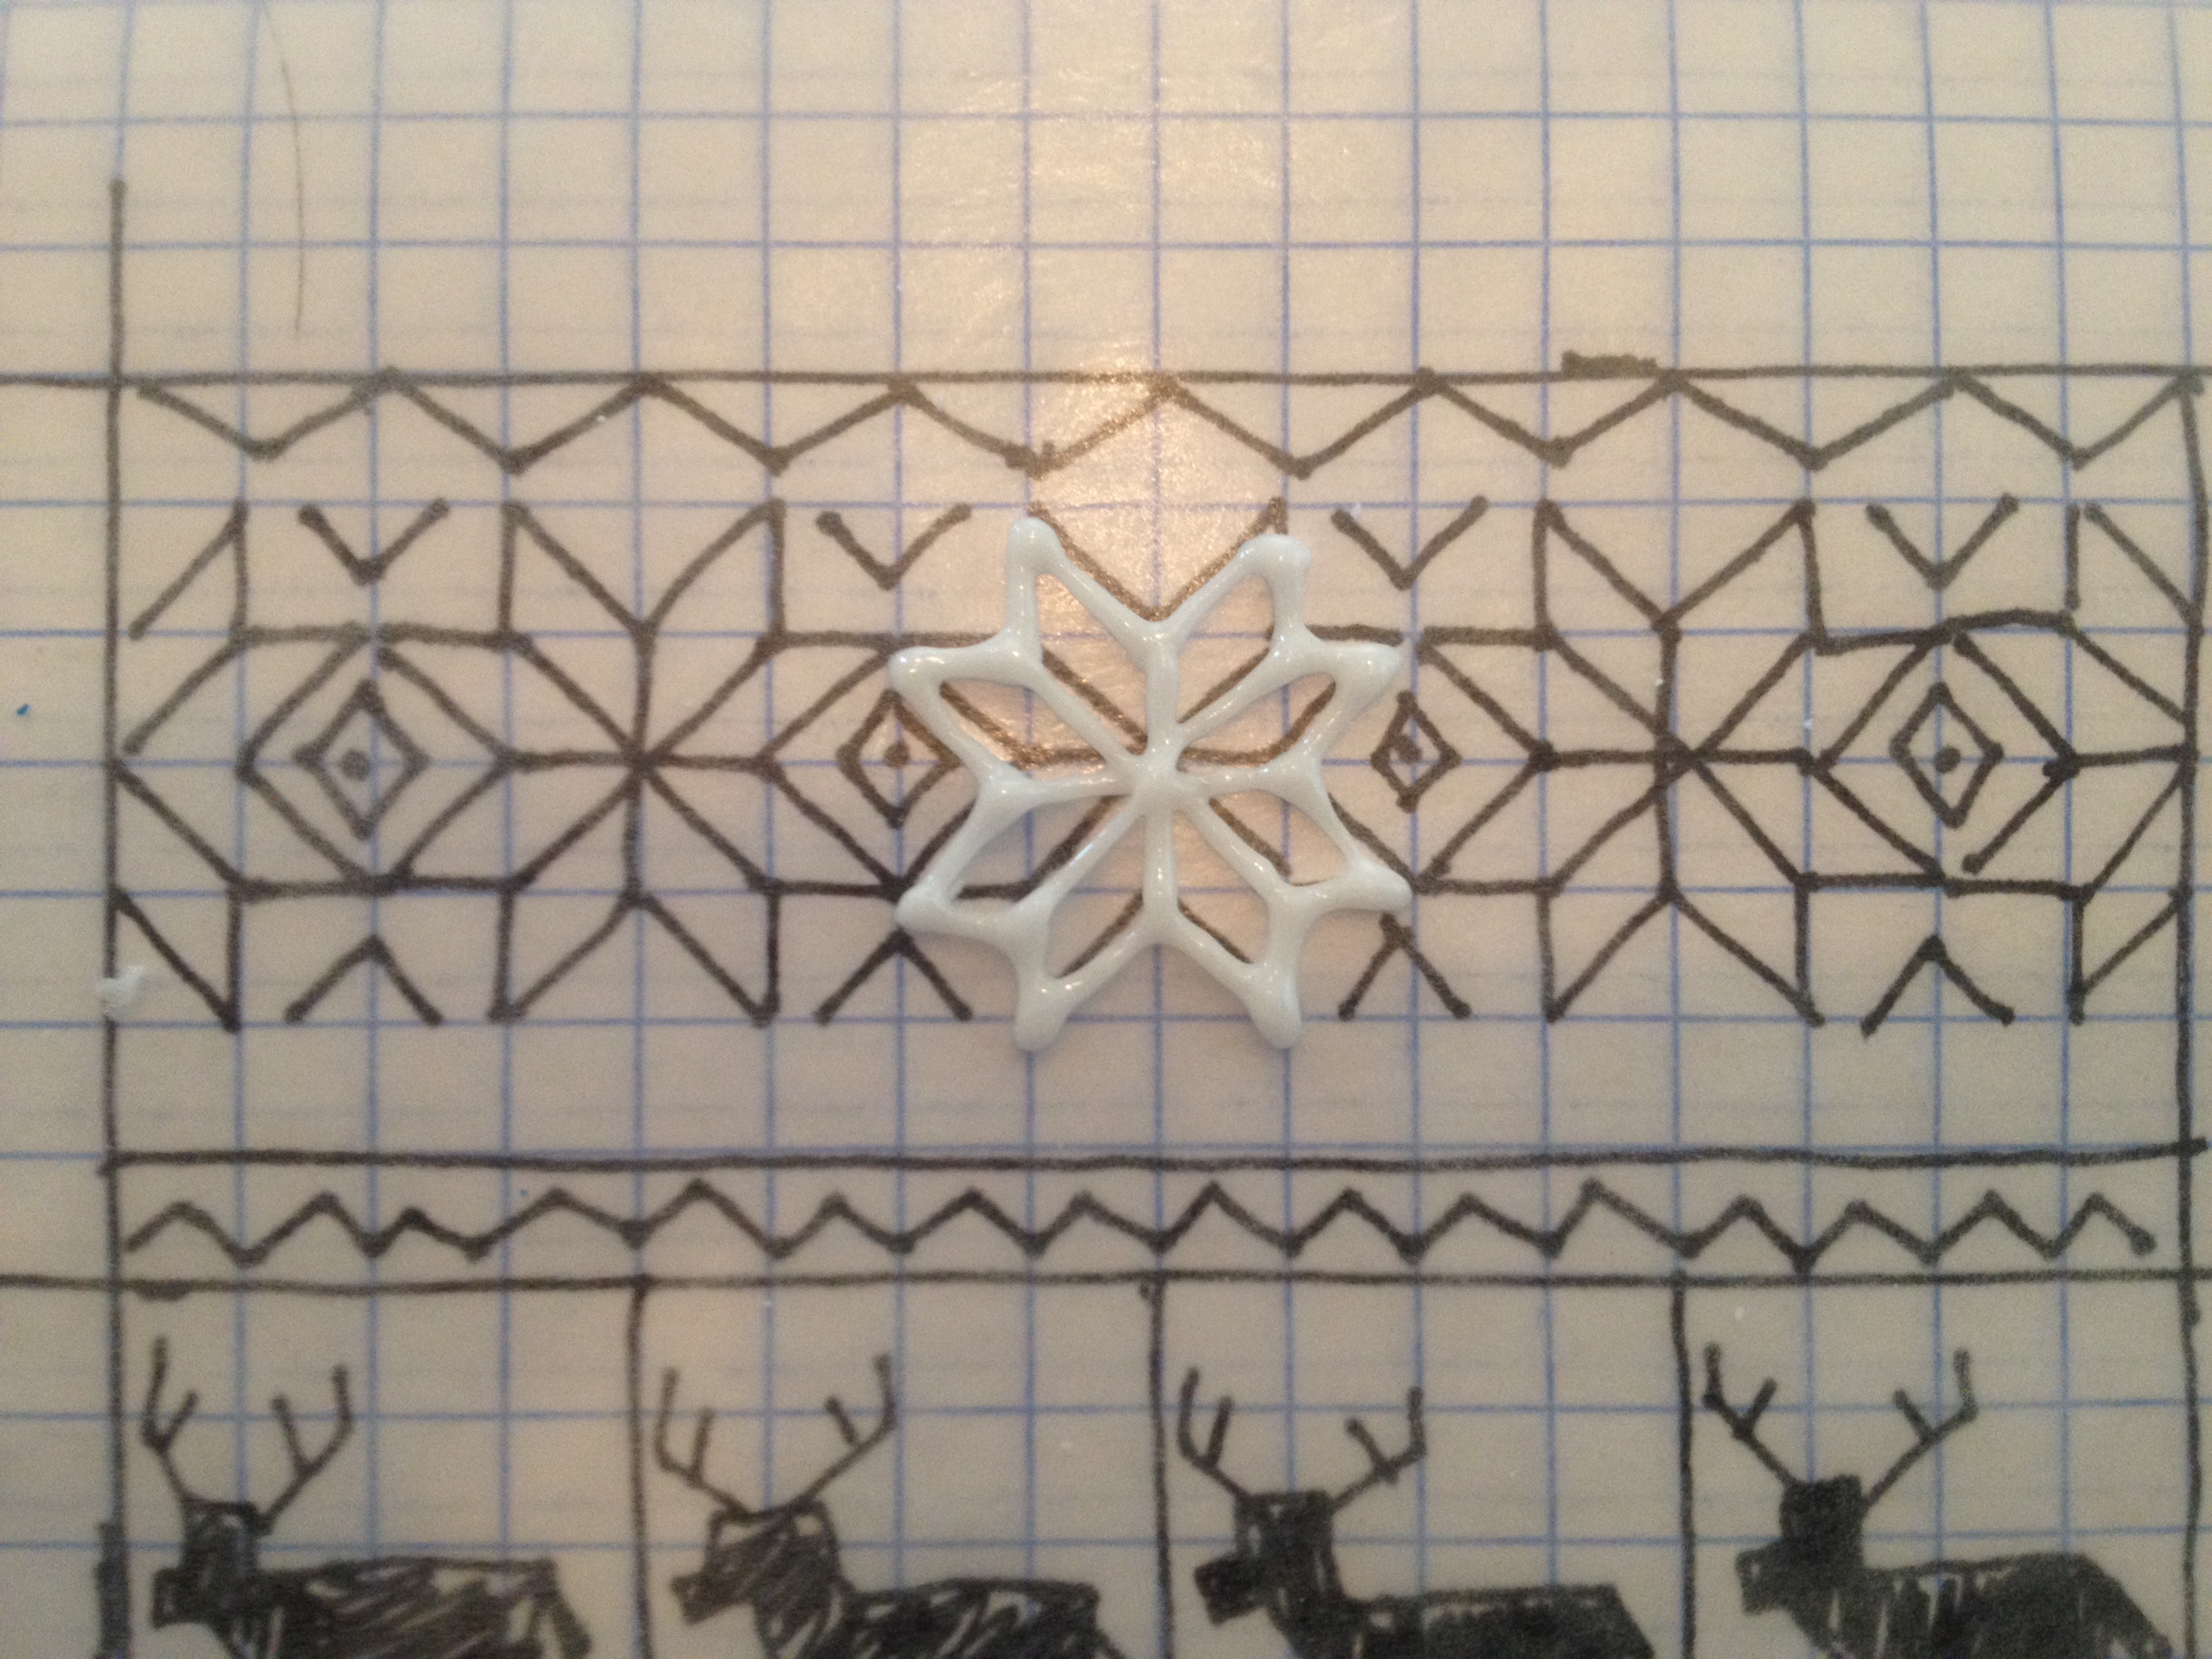

I always double up, especially if the shapes are intricate. Some of your royal icing shapes will break and you will want extras. For this project, two of my reindeer lost antlers and 3 of my snowflakes surrendered. I was glad to have spares.
Allow your shapes to harden for a few hours. Do not try to remove them from the wax paper before they have hardened completely!
Once they have hardened, they will just pop right off the wax paper. I promise!
 Next, dab a bit of fresh royal icing on the back of your shape like so:

This is a bit of a trick. If your base icing isn’t perfectly even, you will want to use a little extra icing on the back to make up for the inconsistencies. But if you use too much, the icing will ooze out the sides.
Then, using your graph paper as a guide, press the shape onto your fully iced cookie.
 Repeat with all of your hardened royal icing shapes, including the happy little trees and happy little snowflakes (RIP, Bob Russ.)

Cool, right? NO! You’re not done! There is a lot of space left on this cookie! Complete the design using dots and lines (and lines of dots).

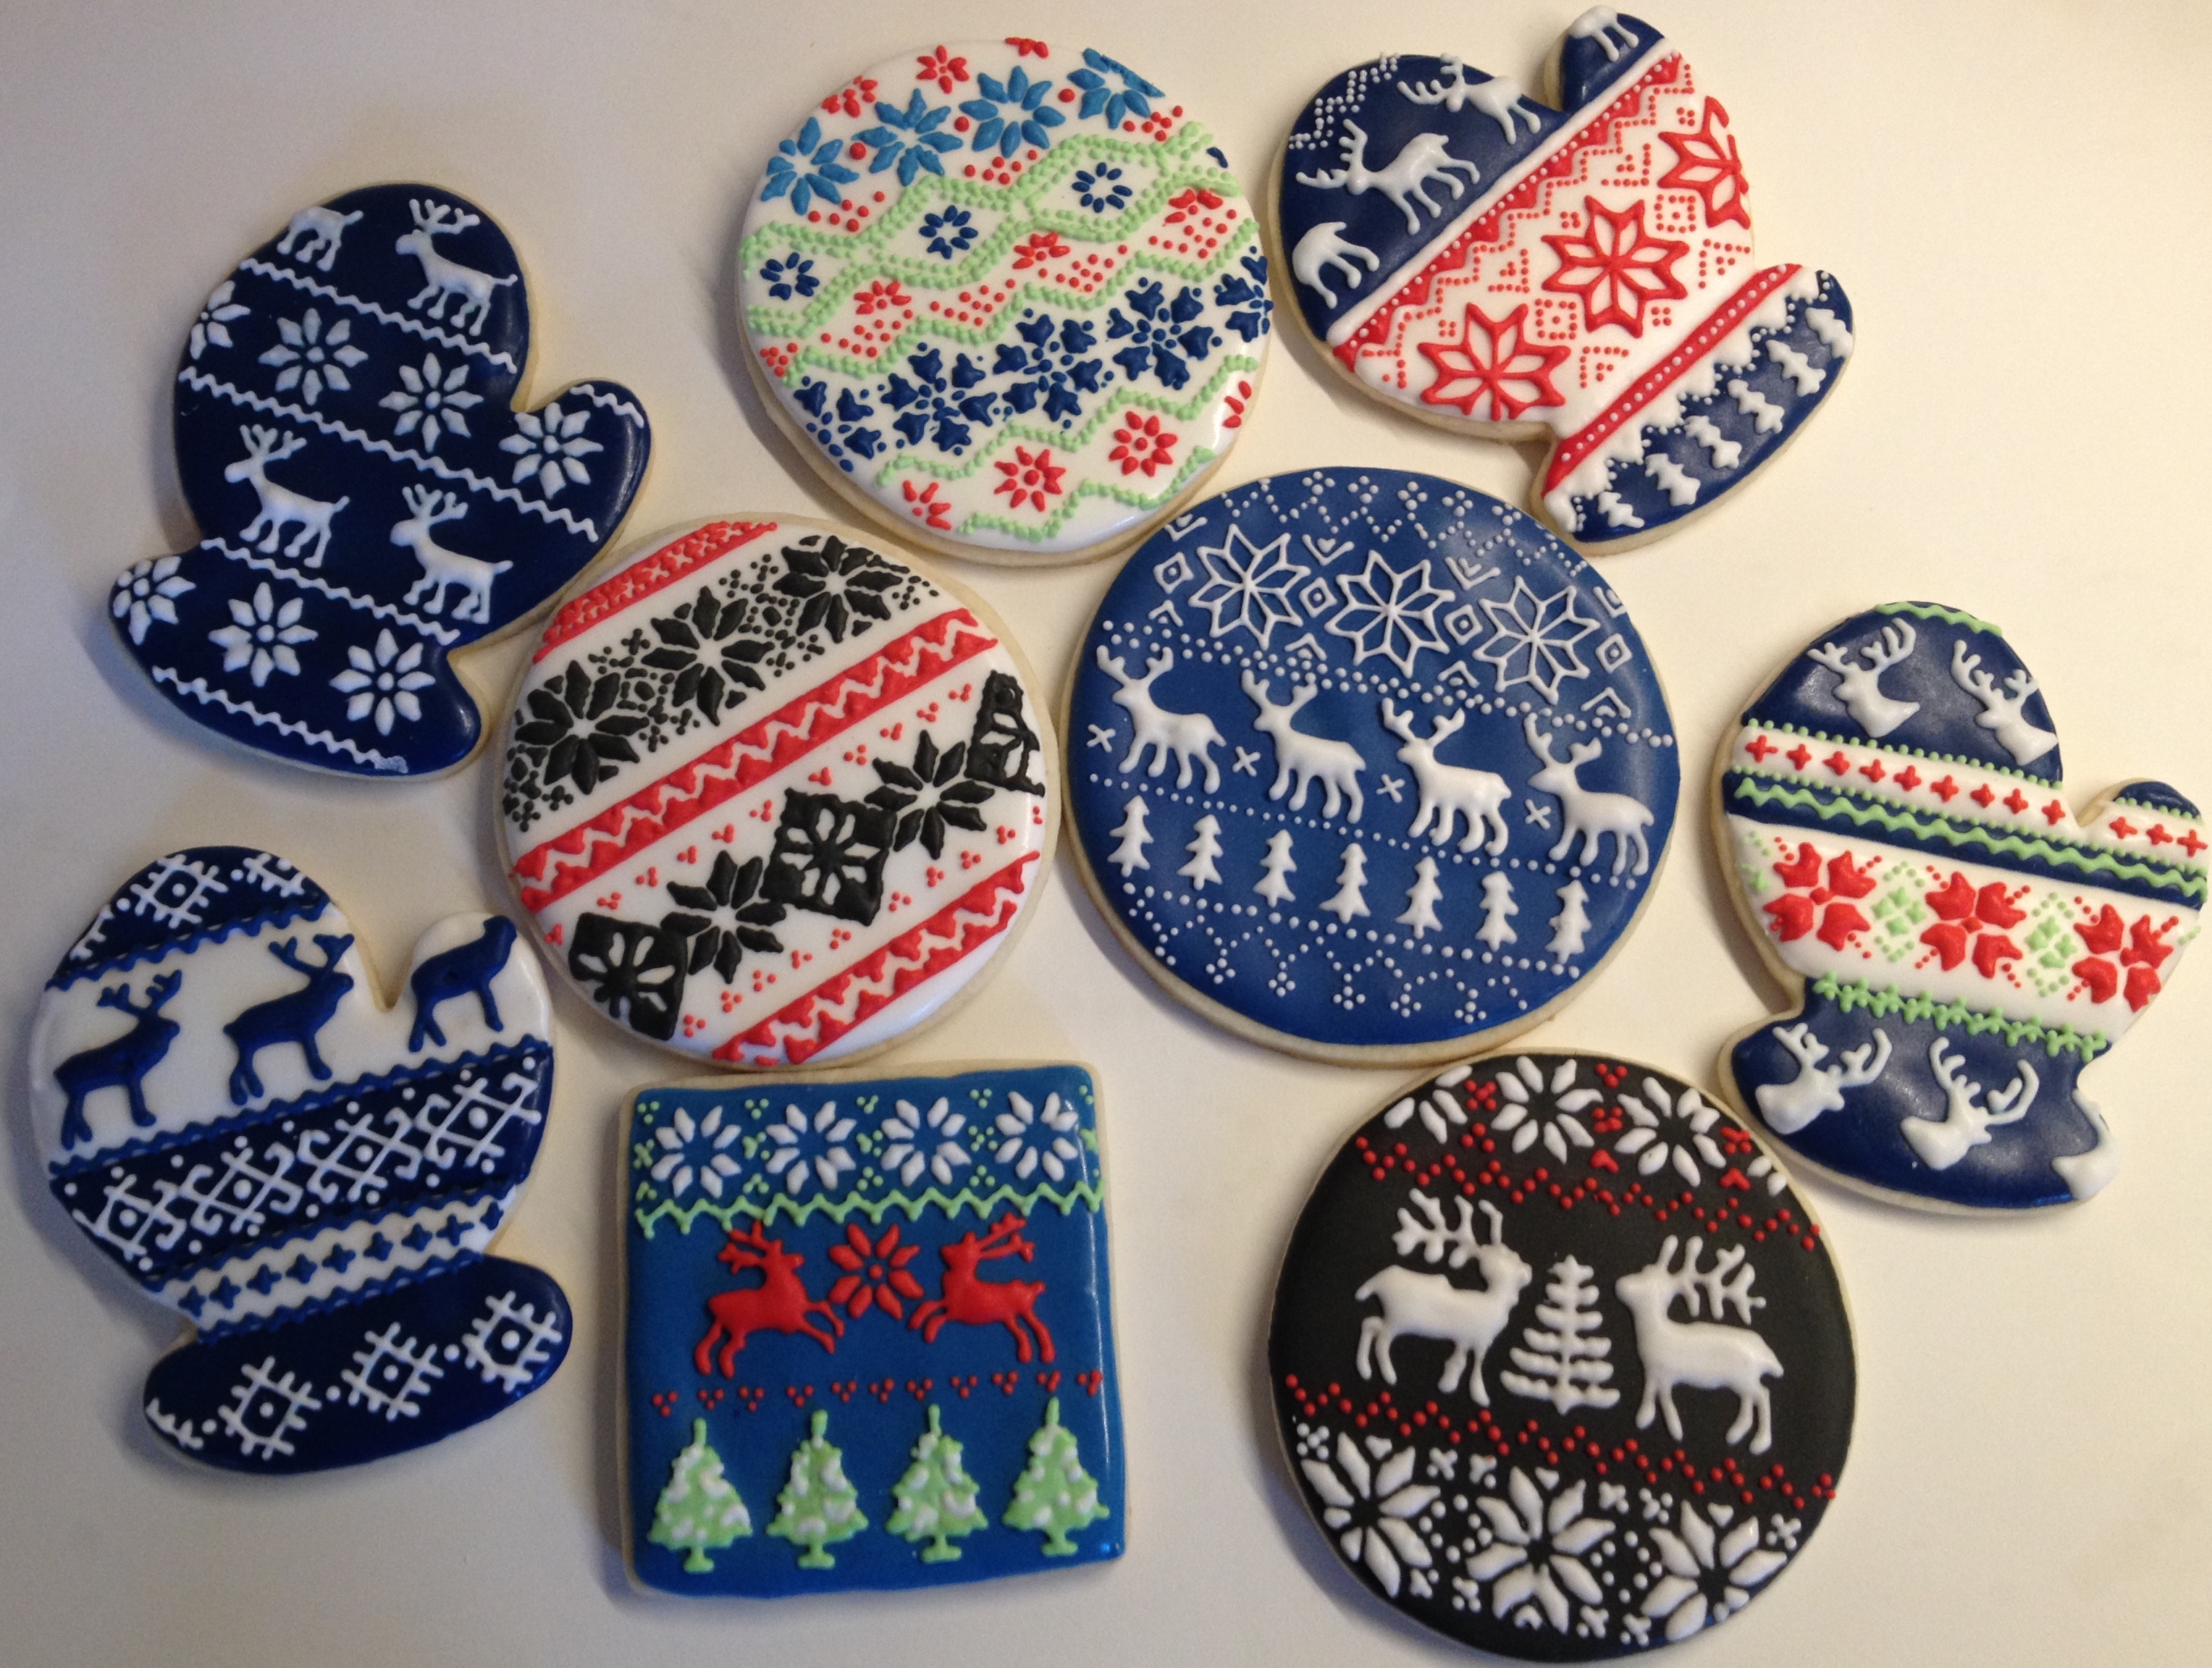
And here’s our cookie with some of its friends, just hanging out waiting for Christmas:
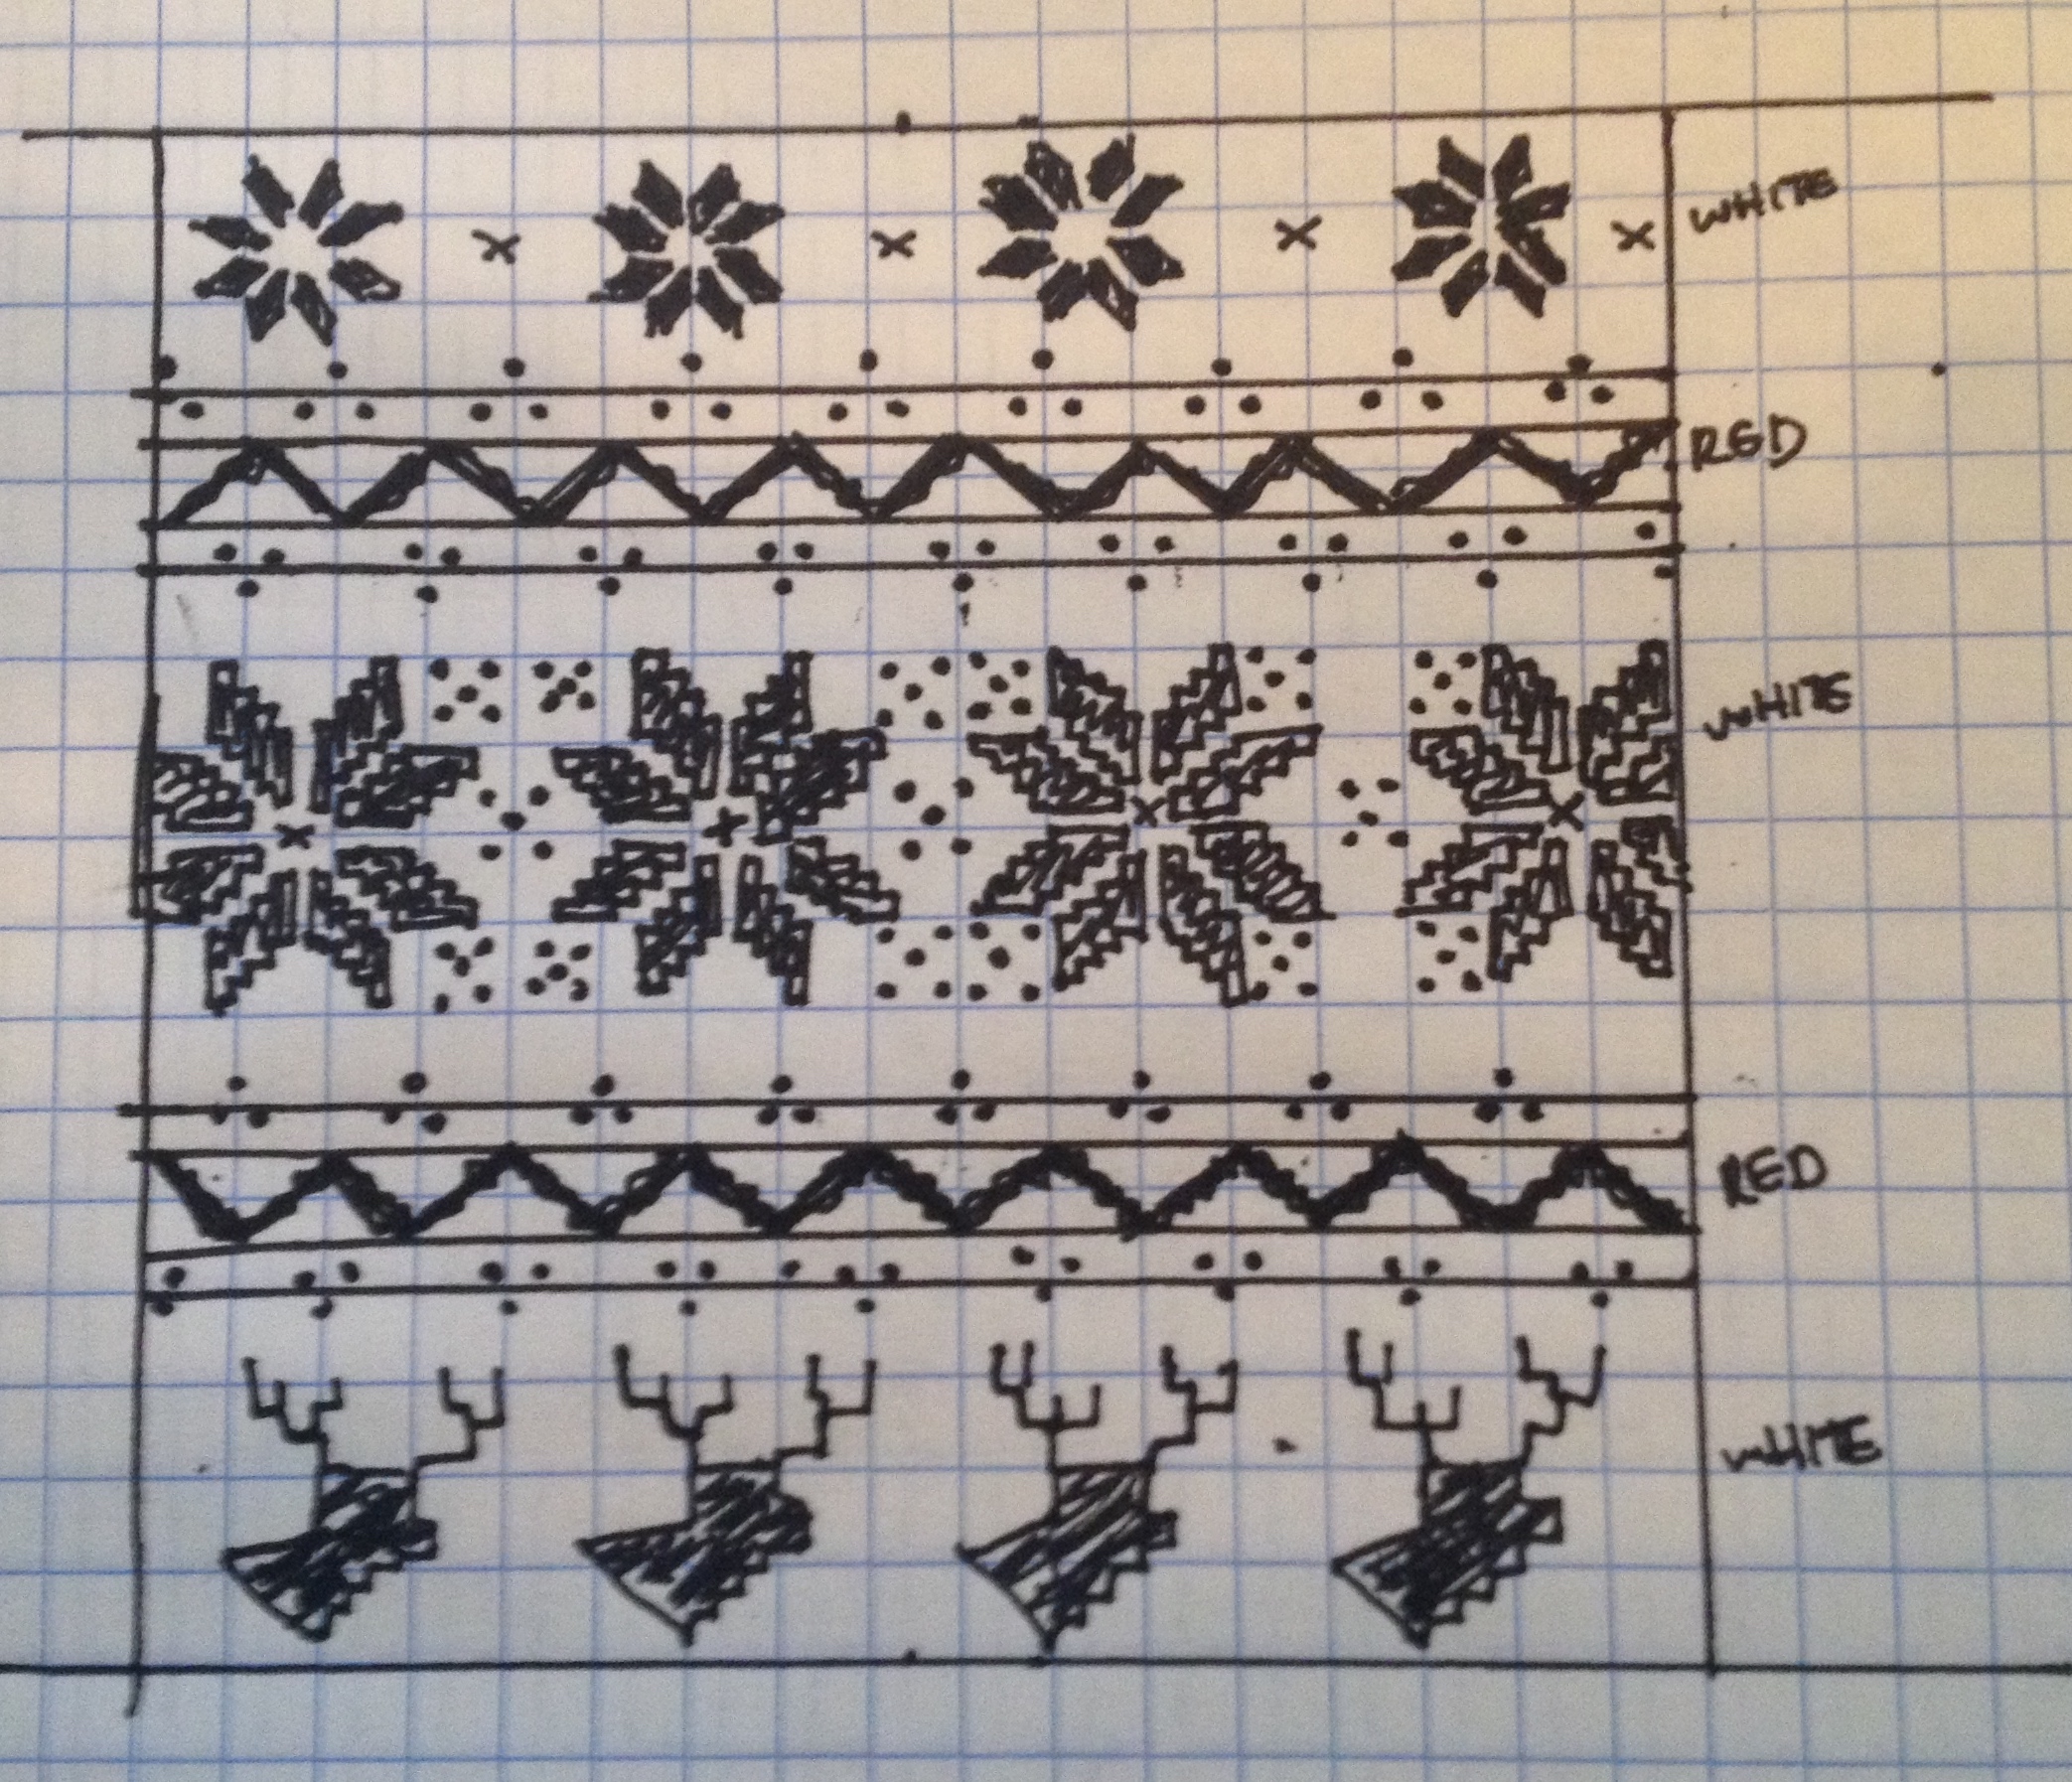
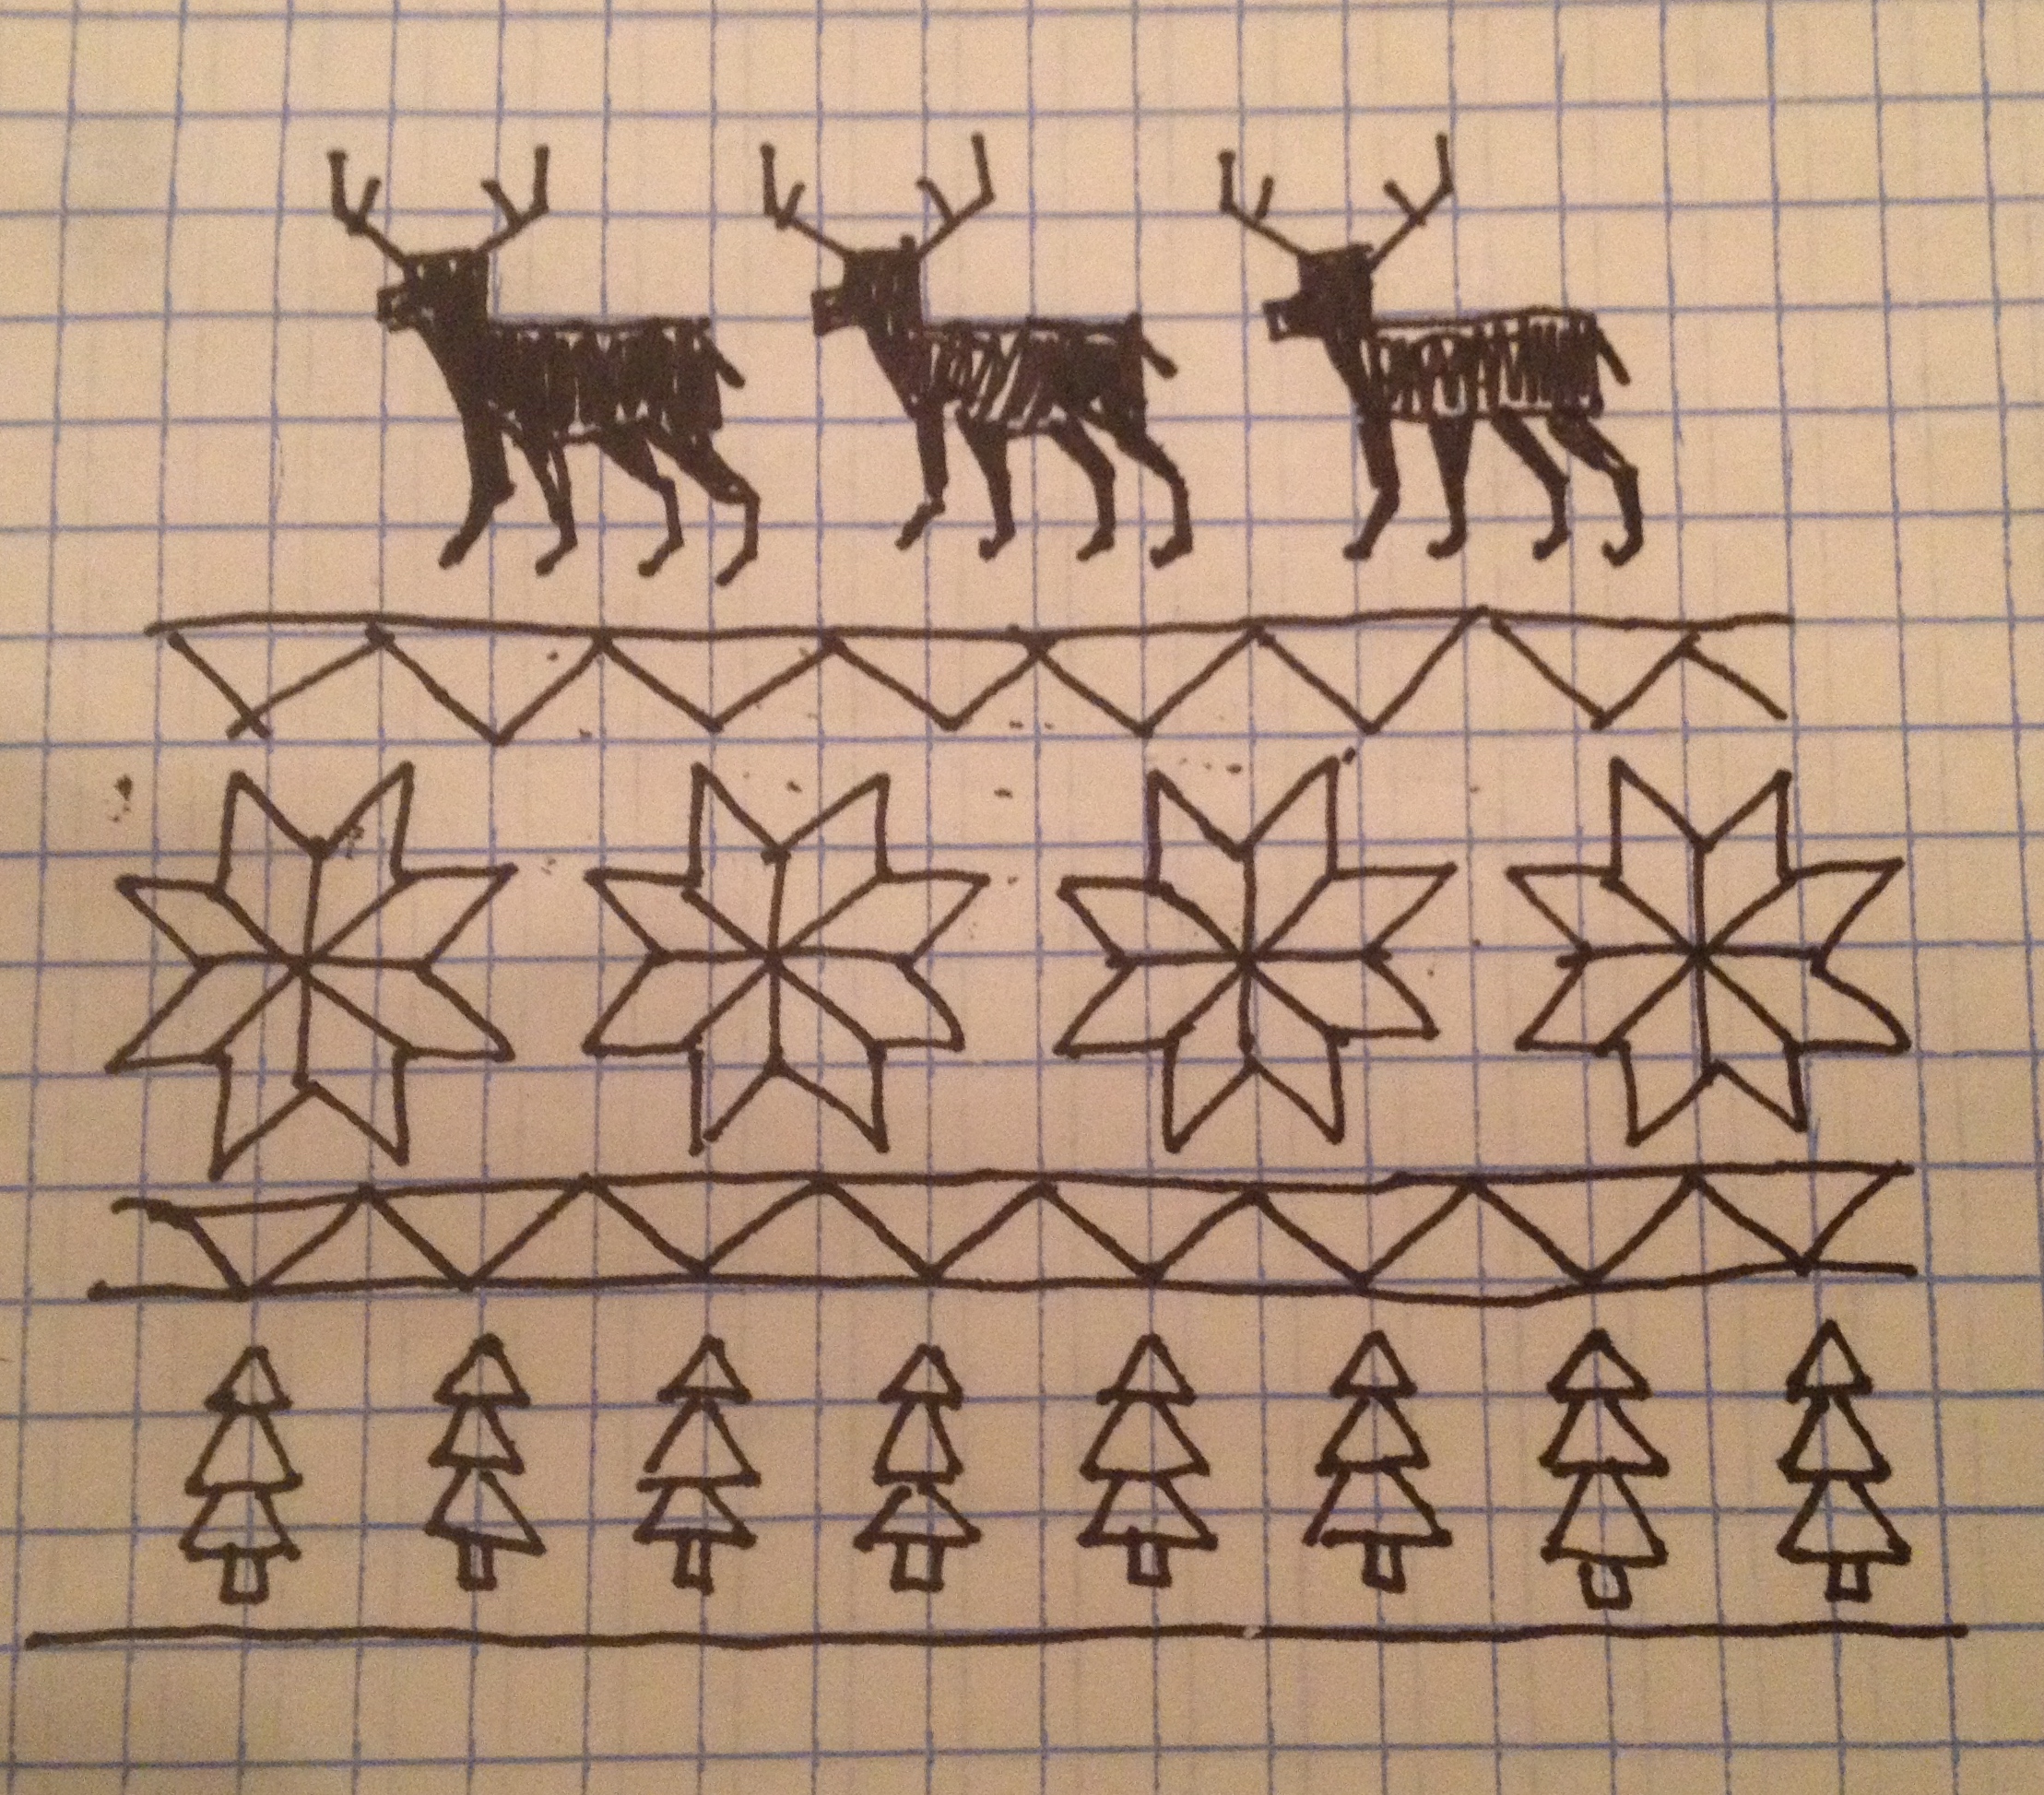
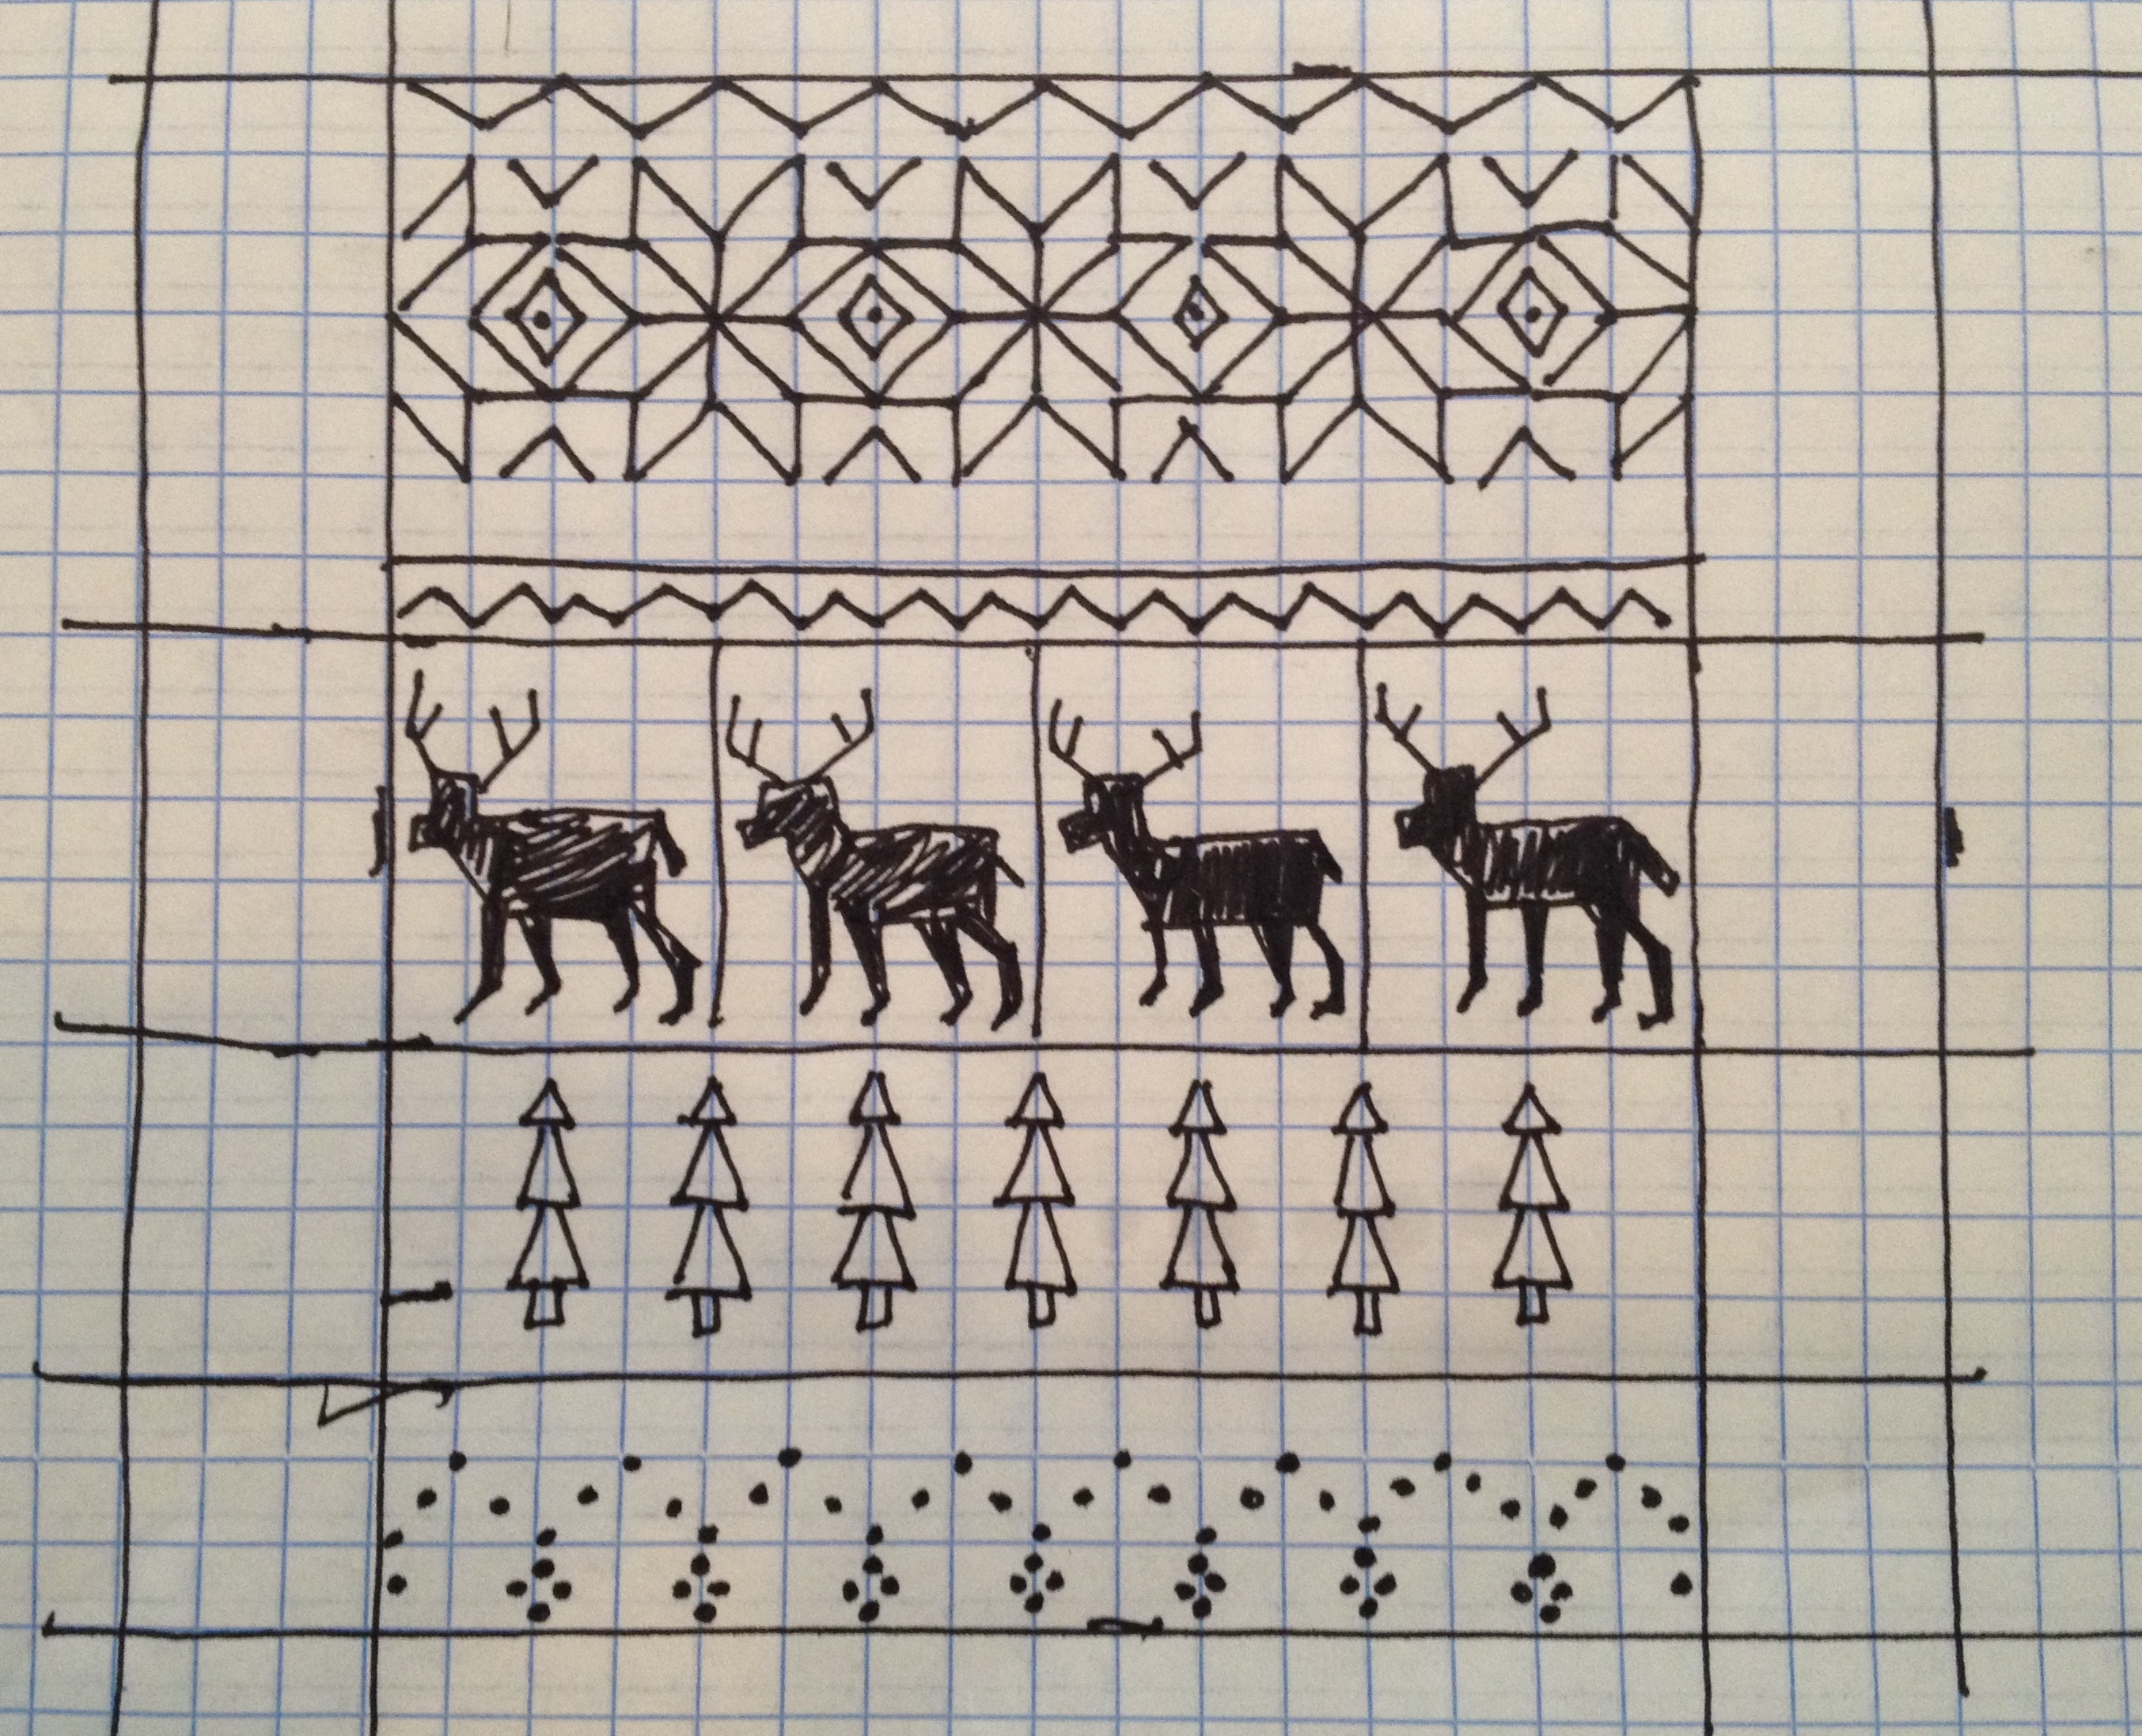
Want more? Here are some doodles for you to play with:


[…] As I discussed last year, I doodle cookie designs on graph paper. Graph paper is great in general, and for this kind of design in particular. To achieve the true repeating pattern effect, the design must be precisely spaced on the cookie. Graph paper allows you to do that. […]
LikeLike
[…] several years of making fussy and complicated sweater-pattern cookies, I decided to keep it simple, clean, and easy this year. There is beauty in simplicity, right? […]
LikeLike