I am terrible at identifying cookie cutter shapes. For years, I thought one of my cookie cutters was a tomato shape. Nate flipped it upside down and informed me it was a balloon.
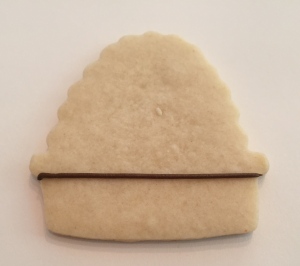
I have a shape that looks a lot like a beehive to me. Or perhaps a man in a hat with a beard. I honestly don’t know (if anyone out there can correctly identify this shape, please tell me!) It is this:
A recent request for hydrangea cookies made me see this beehive beard man as a basket of flowers. Regardless of whether you have this shape, you can create these neat flower baskets.
Prepare ahead:
- 30-40 hardened royal icing flowers in shades of blue and purple.
- Very thick brown royal icing.
- Flooding consistency (10-15 count) blue royal icing.
For this project you will need about 30 completely dry royal icing flowers (see tutorial here.) Because this is a hydrangea basket, I piped the flowers in shades ranging from light blue to dark violet using a small petal tip (101s). You can easily modify the color and size of the flowers to suit your taste. These can be made ahead of time (I actually have containers full of these things because I am working on a larger hydrangea project).
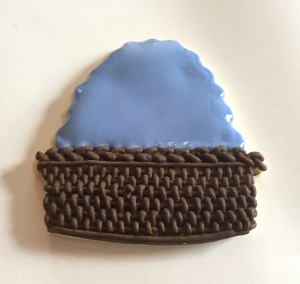
To make the basket, fit your bag with a #1 or #2 round tip and fill it with thick brown icing.
Pipe the first line straight across the cookie just below the lip of the basket:
Then, pipe evenly spaced lines perpendicular to the first line:
Next, pipe a line parallel to the first line over the small lines:
Then, pipe another row of perpendicular lines spacing them between the first row of lines:
Continue these steps until you reach the bottom of the cookie.
Once you have completed the basket, turn the cookie on its side and create a braided effect at the top by piping overlapping diagonal lines:
Continue until the braid stretches the entire width of the cookie:
Using your flooding consistency blue icing, outline and fill the top of the cookie:
While the blue icing is still wet, begin attaching the hardened flowers, varying the colors and sizes to create your desired effect:
When you have covered the cookie in flowers, use a small dot of royal icing to attach a few flowers on top of the first layer, which will create a three-dimensional effect:
Creating the royal icing flowers takes a bit of time, but once you get going, these cookies are very easy to make.
There is more from this project to come! Stay tuned!


I am the luckiest to have these for my bridal shower! So so beautiful and detailed. And guess what? They taste great too! I’m glad to see how they were made. Thank you so much!
LikeLike
[…] that mystery cookie cutter I found last spring? I still haven’t figured out what it is, but it has become very handy. […]
LikeLike